 SchematIaC Docs
 Getting started
From install to your first write-back in about five minutes. No terraform binary required; everything runs inside VS Code.
1. Install the extension
Install SchematIaC from the Marketplace, or search for SchematIaC in the Extensions view. It needs VS Code 1.74 or newer, works with both Terraform (and OpenTofu — same HCL) and Azure Bicep, and needs no terraform or bicep binary.
The first canvas you open offers a free six-month licence: enter your email, then the 6-digit code we send back. Everything is unlocked; see Licensing & privacy.
2. Create a canvas
- Run New SchematIaC Canvas from the command palette and name it after the project — one canvas is one definition, not one per environment (workspaces handle dev/test/prod).
- Right-click a
.tf,.tfvars,.bicepor.bicepparamfile, or a folder in the Explorer, and choose Add to SchematIaC Canvas — or use + Add file on the canvas toolbar. A canvas holds one language; the first file you add decides whether it is a Terraform or a Bicep canvas.
Local modules load automatically when their caller is added; each appears as a box with input and output ports. Terraform registry and git modules load from what terraform init vendored under .terraform/modules. A Bicep br: module shows as a box with a note.
The canvas itself is a small .schematiac/<name>.canvas file — safe to commit, safe to delete, never your infrastructure.
3. Trace a value
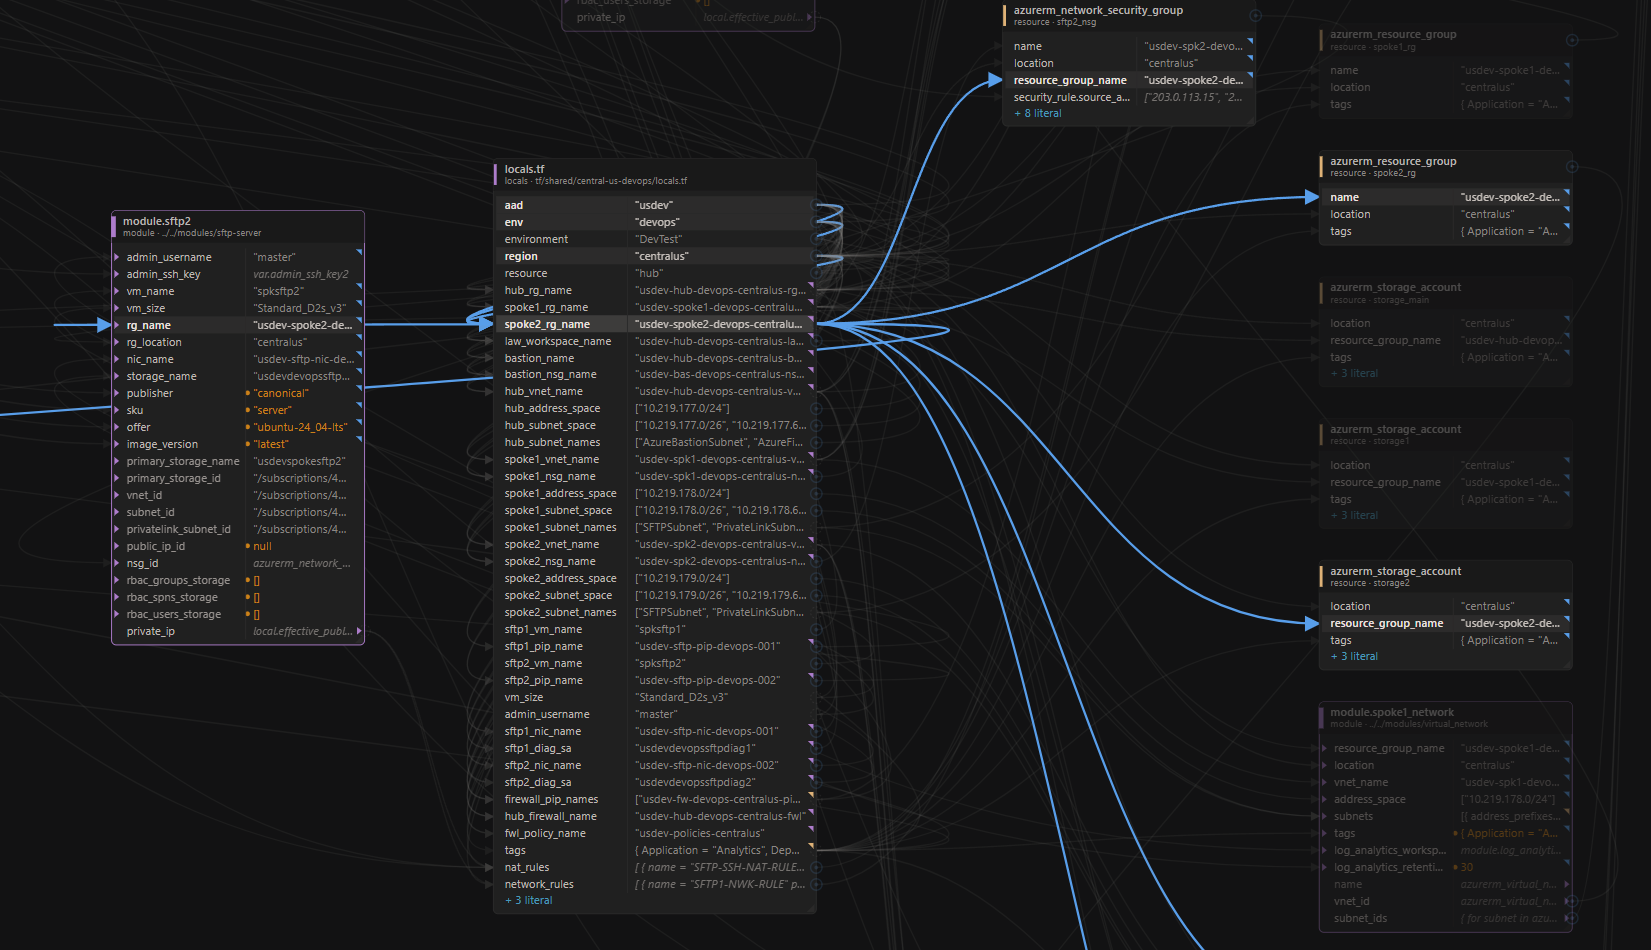
Blocks are nodes; attributes are rows; references are wires. Variables, locals, outputs and tfvars entries group into one node per file. Click any row and its whole lineage lights up — the tfvars entry that fed the variable that fed the resource attribute — while everything else dims.
Values show what they resolve to, not the expression: "${var.env}-acme" reads "dev-acme". A corner mark says when a value was computed rather than typed; hover it for the expression behind it. See The canvas for what every mark means.
4. Change something and save
- Re-point a reference: drag a wire’s source dot onto a different variable, local or resource. Compatible targets light up; a list can never be dropped where a string is expected.
- Edit a value: click a definition in the properties panel and type a new expression. It is validated as HCL or Bicep before it can touch a file.
Every change shows you the exact line diff for approval, then stages until you press Save — which reviews every pending file one last time, with per-file revert. Only the expression you changed is rewritten. Nothing reaches disk before Save.
Where next
- Terraform —
.tf/.tfvars, workspaces, Upgrade Preview and the Folder Overview. - Bicep —
.bicep/.bicepparamon the same canvas. - MCP server — give your AI agent the same engine. SchematIaC is not another agent; it is the tool that agent should call.
- The canvas — everything on screen, explained.
- Issues — file a bug or a feature request. Licensing stays at support@solidcloud.io.